API Manager
Anypoint Platform’s API Manager policies can only be applied to the applications which are deployed only on CloudHub. For other modes of deployments, you need to have other ways of applying policies.
This article helps you how to apply policies via Anypoint Platform’s API manager.
We have 2 ways to apply policies :
Creating Proxy API’s
Without Creating Proxy API’s
The main difference between the two of them is either :
Mule itself will create a Proxy application on top of your “actual” application which has api auto-discovery.
or
Using API id in Auto-Discovery of your “actual” application
API auto-discovery
API auto-discovery is a mechanism that manages an API from API Manager by pairing the deployed application to an API created on the platform.
We shall see how in detail:
1) Without Proxy API (API auto-discovery):
This way of Deploying an application to invoke policies needs 2 Things:
API id generated in API Manager and used in the global element “Auto-Discovery” of your application.
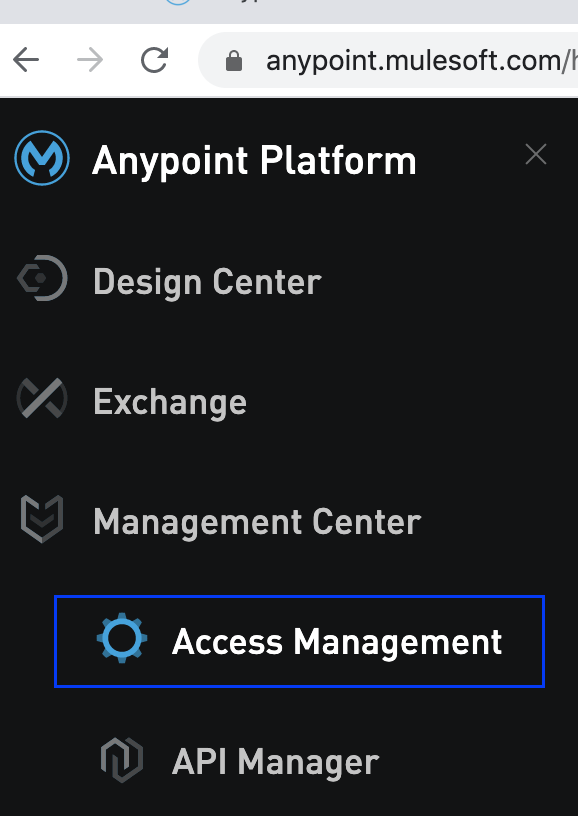
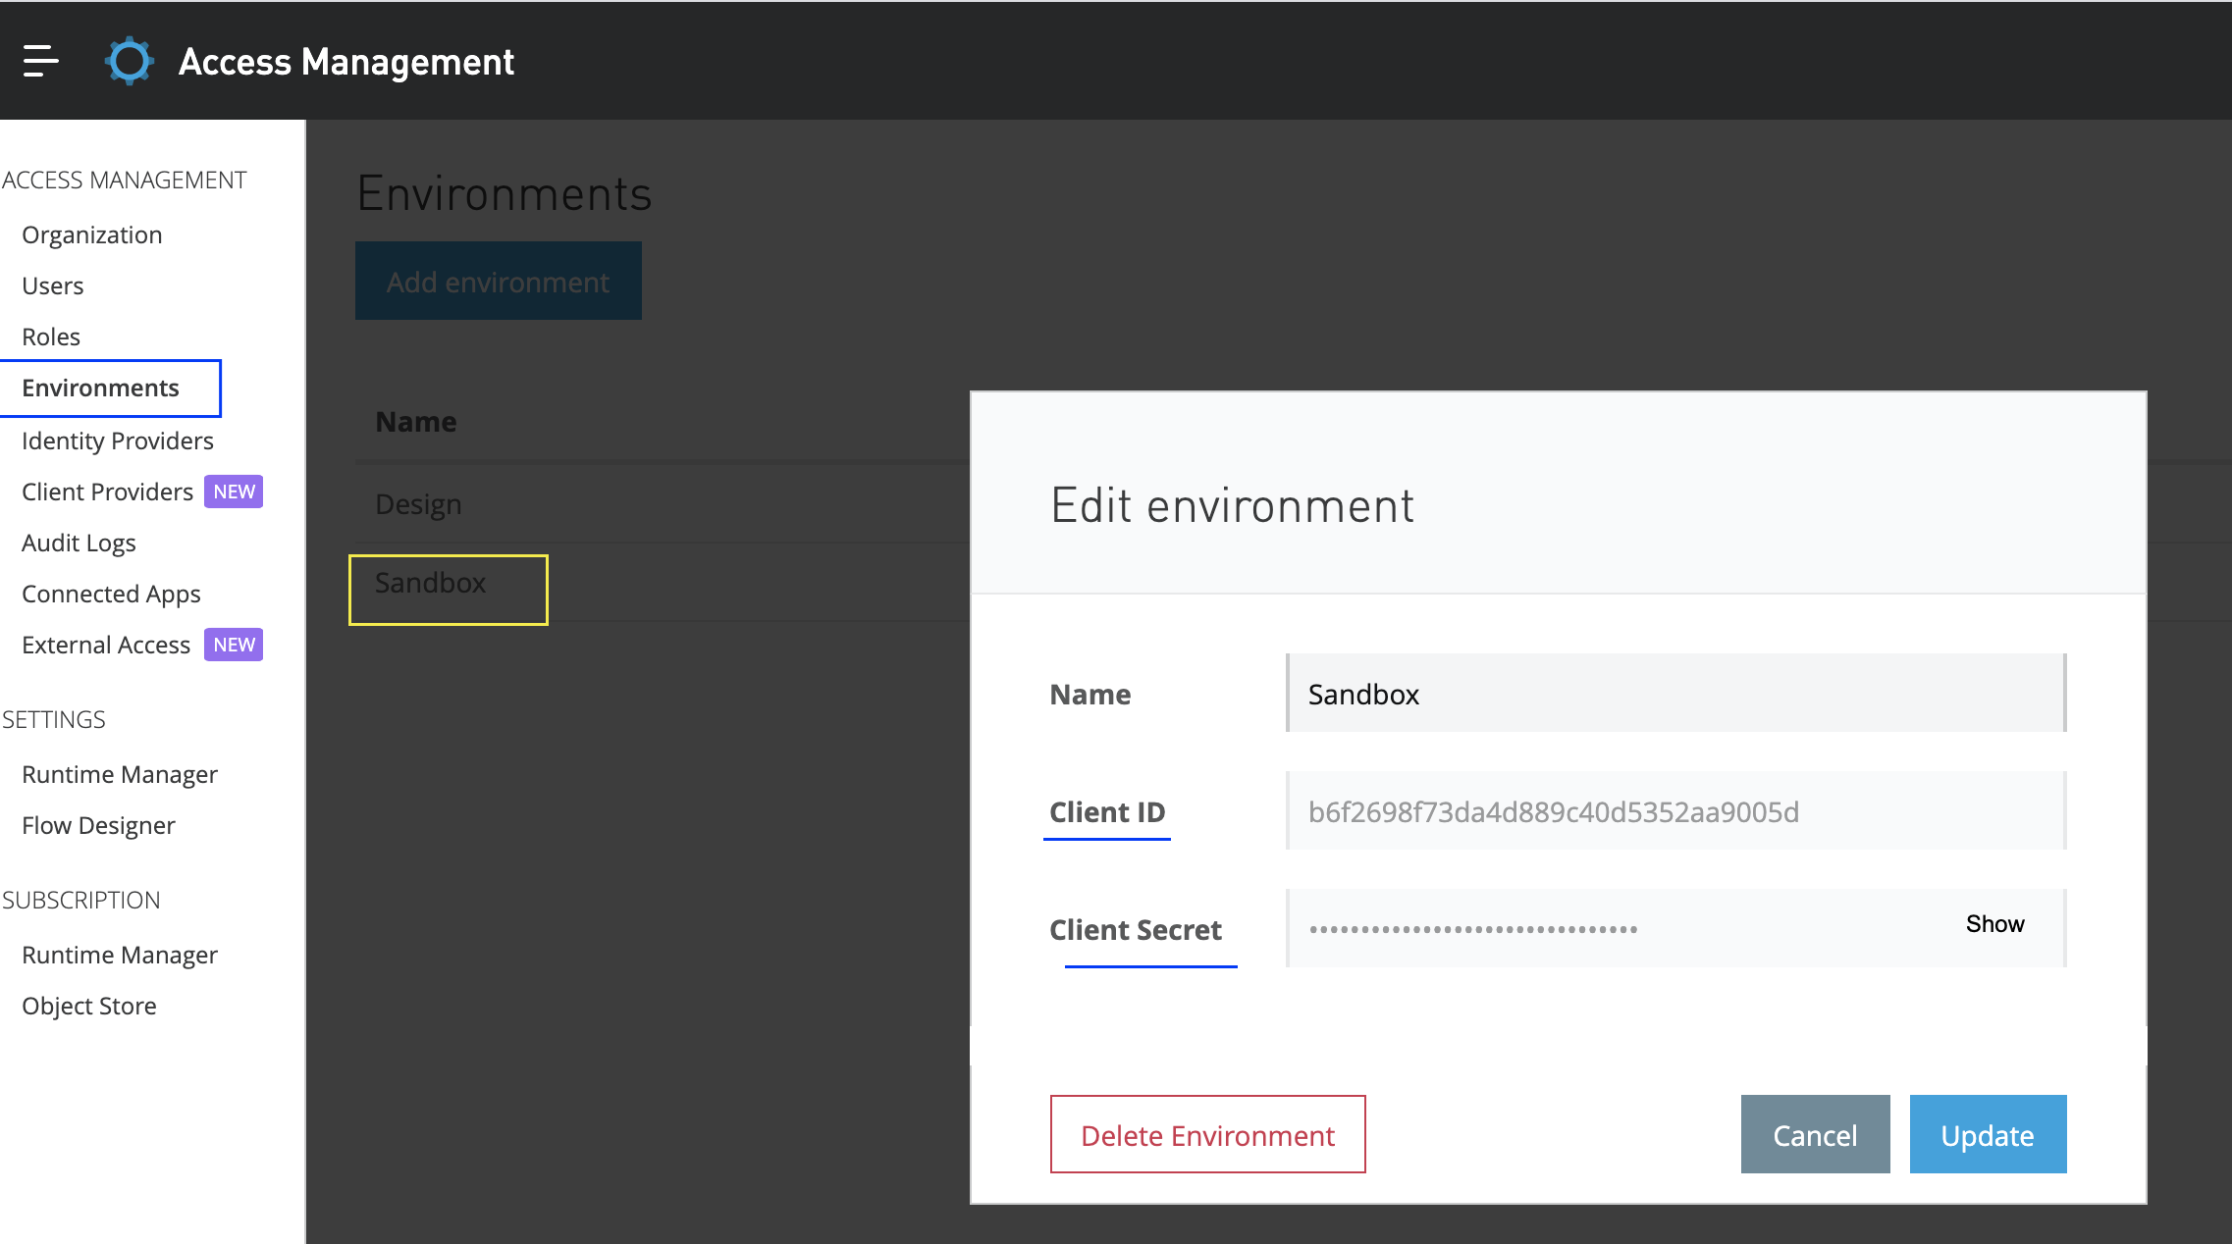
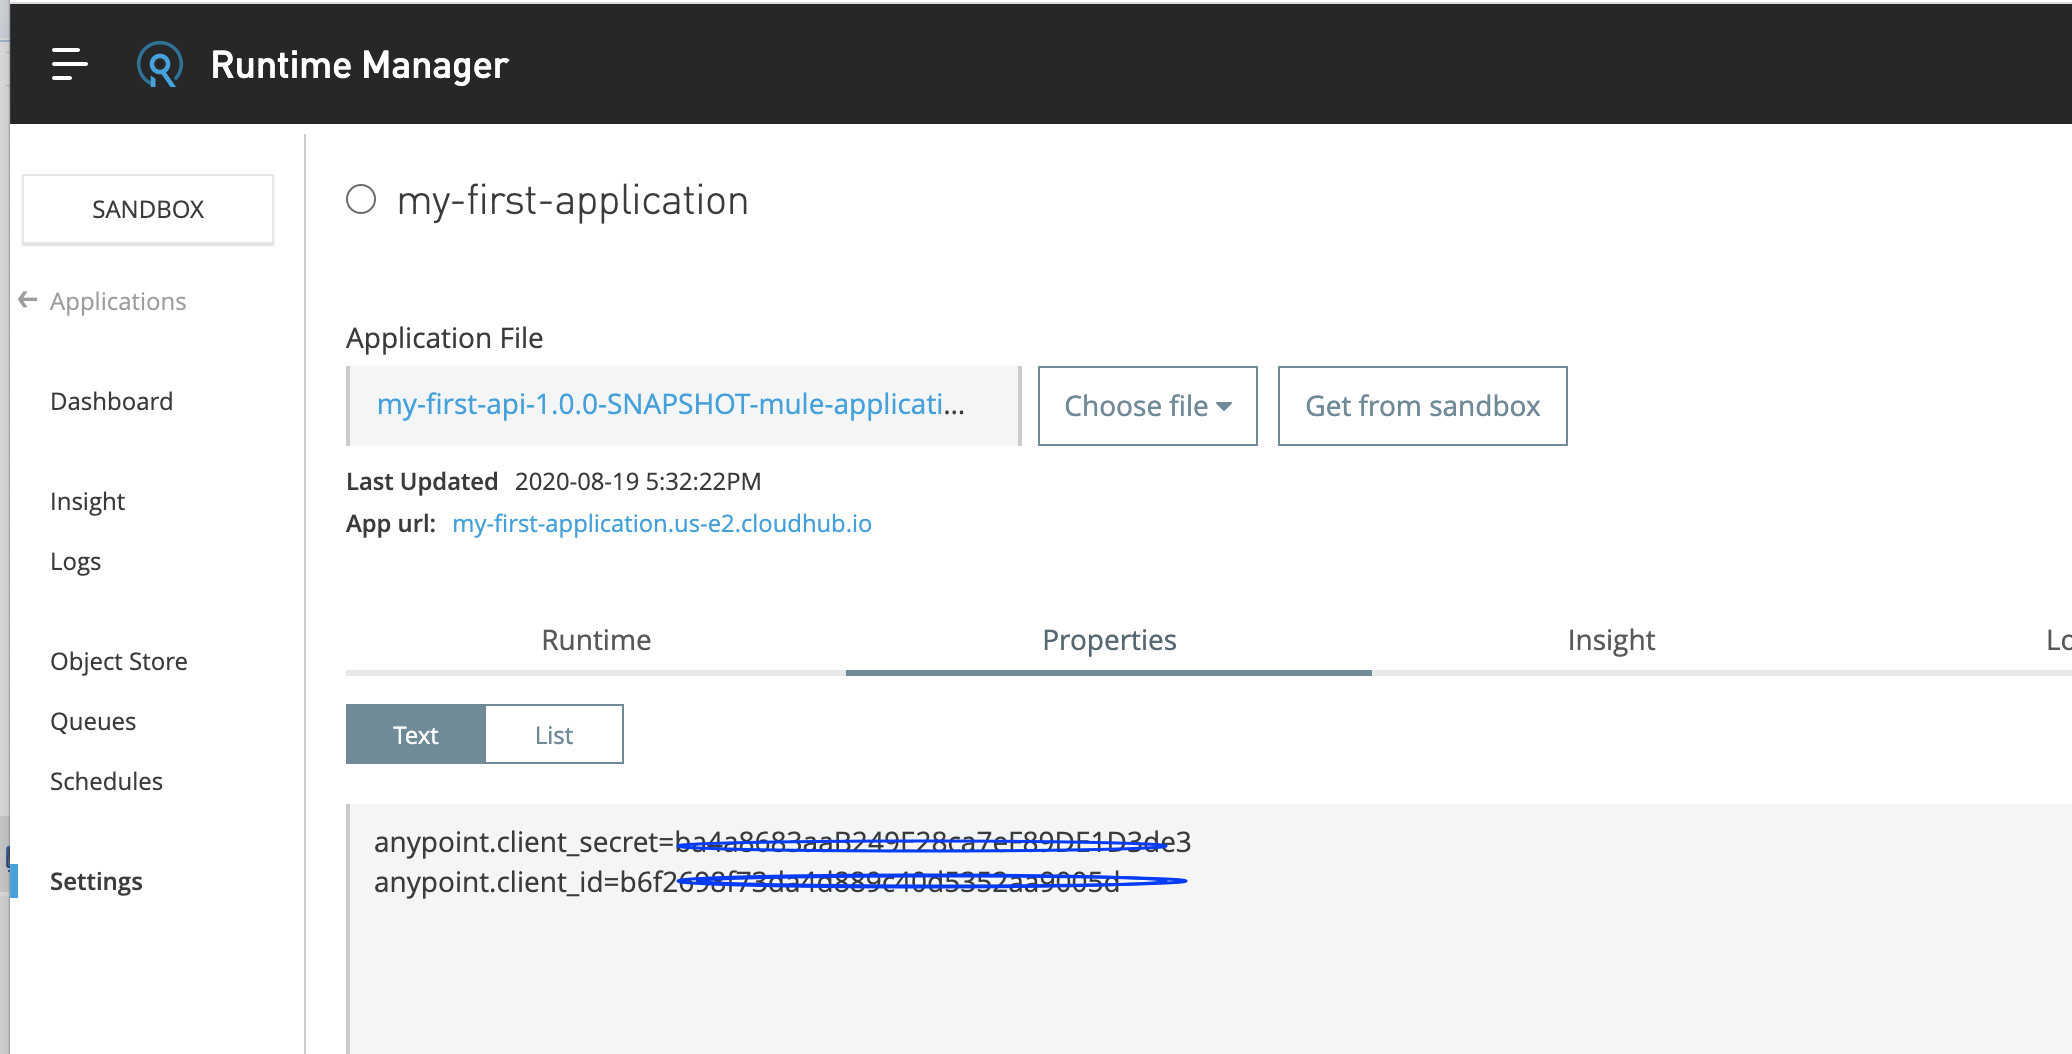
Need Anypoint platforms client id and secret. We can get them from “Access Management” Under Environments Tabs —> Choose the environment in which your application is getting deployed. Use them in Runtime properties while deploying the application in below way
anypoint.platform.client_id : xxxxxxxxxxxx
anypoint.platform.client_secret : xxxxxxxxxxxx
With help of these 2 things, we can see in API Manager, the status of API will turn from “Unregistered” to “Active”
Step 1: Design a RAML, Publish to exchange. After that import the RAML to anypoint Studio and generate the flows.
Step 2: Go to API Manager, Click on Manage API and choose “Add New API”
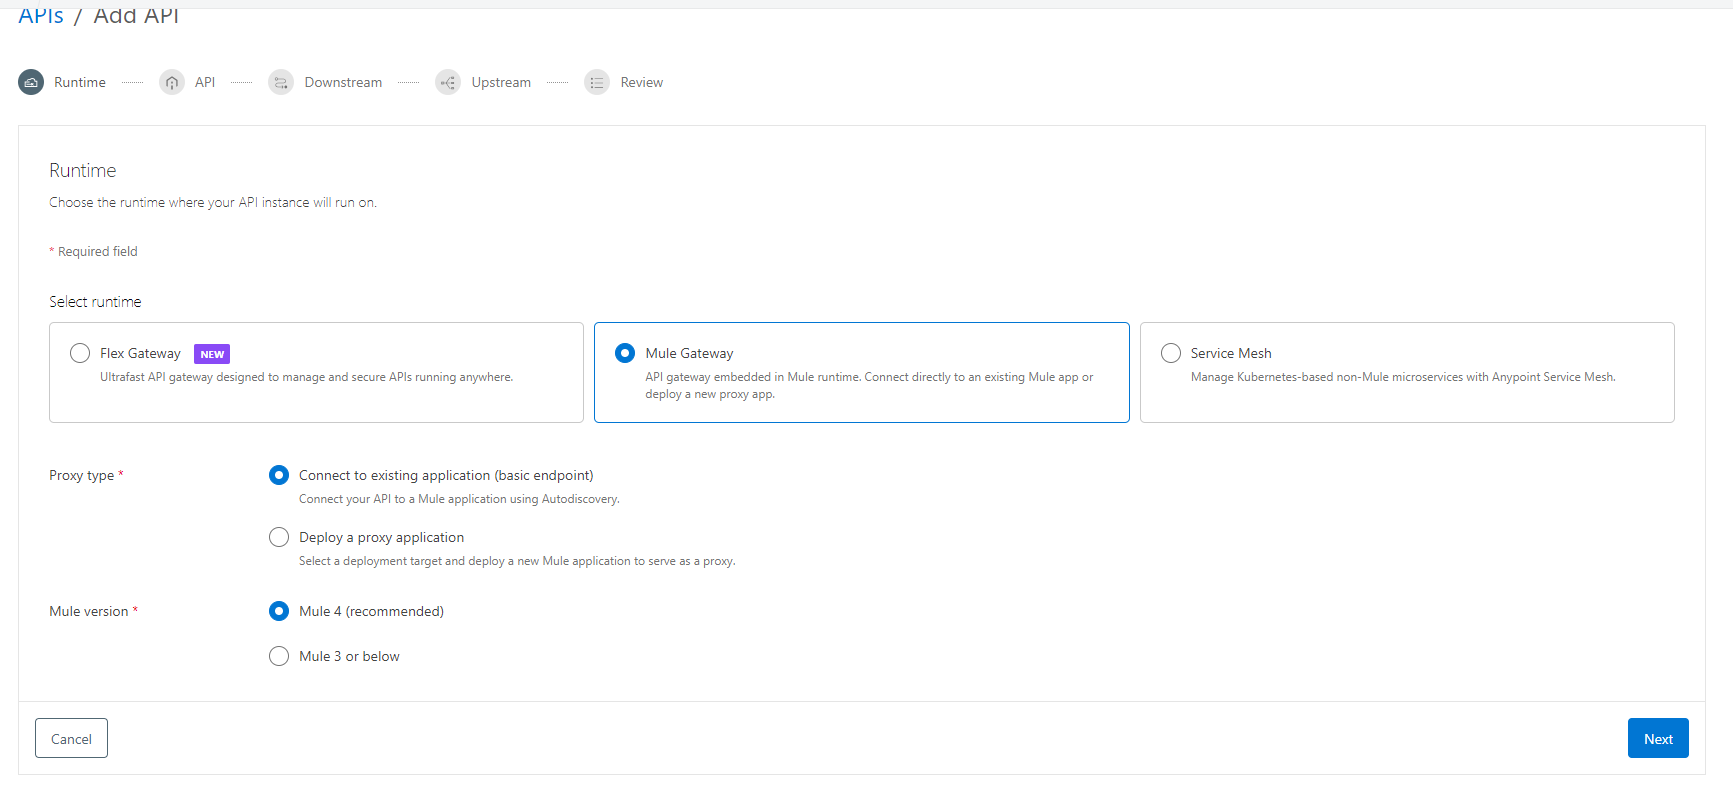
Step 3: Connect to the existing application -> Mule 4
Click on Next,
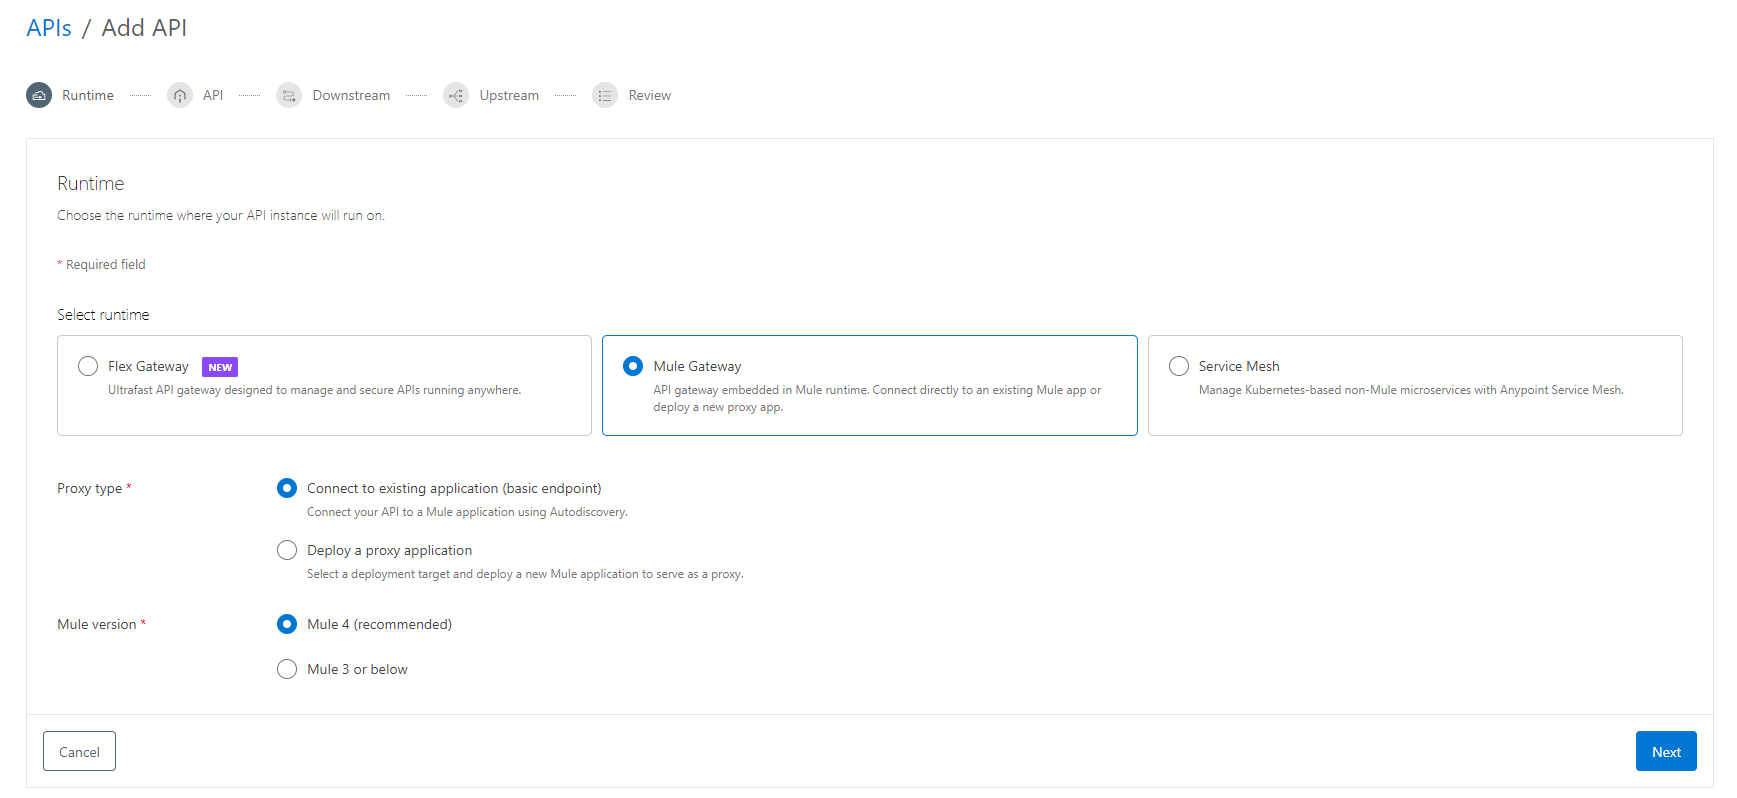
Select the API from exchange and click the next.
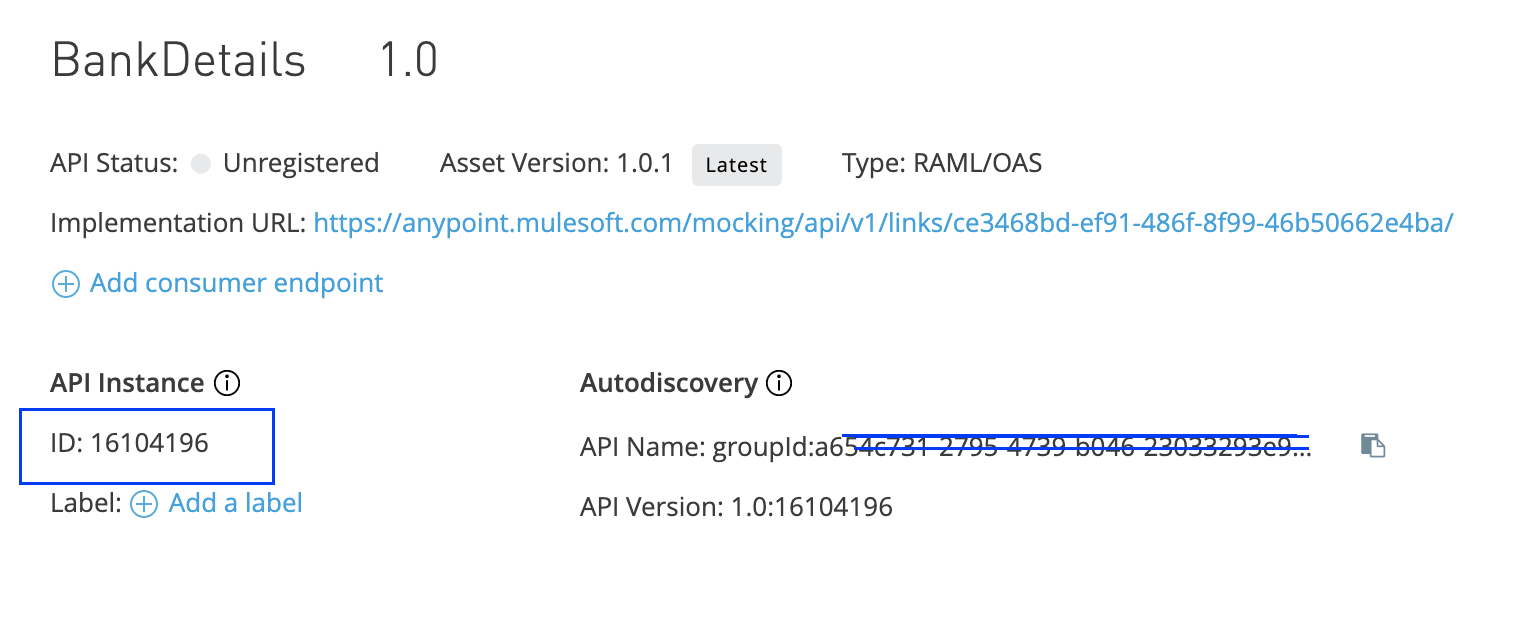
Step 4: Go to the Application in Anypoint Studio, Create a Global Element Auto-Discovery and Add API id and choose the flow name (usually Main flow where the request listens)

Step 5: Go to Access Management.(The Owner of the account can have access and can view this option. If you are not seeing this, that means you need to request the owner of Anypoint platform account) . Choose environments Tab and select your env. Get your client id and secret
Step 6: Go to Runtime Manager, Add Runtime properties like below and deploy.
Now your API in API manager status will turn to Active and you can start applying policies. By going to Policies —> Apply New Policy.
Note : No Need to Restart the application once the policy is applied. It will reflect within seconds automatically. Even if you add one or more policies at a later point of time, no restart of the application is required.
2) Creating Proxy API:
In the above method, we have seen a lot of manual processes required like getting API id, client id, secret, placing in Application, and in Runtime properties. To avoid all these, we can go for a 2nd approach to create a Proxy application.
This Proxy application is nothing but a kind of Wrapper to your main Application. So now for each application, we will have 2 apps in Runtime Manager.
Your Actual Application
Your proxy Application that is deployed which has api id, client id, secret everything within it. No manual effort required to deploy. It’s deployed from the API manager.
Step 1: Design a RAML, Publish to exchange. After that import the RAML to anypoint Studio and generate the flows.
Step 2: Go to API Manager, Click on Manage API and choose “Click on New API”
Step 3: Select the Proxy type as “Endpoint with Proxy” and Target type as "CloudHub 2.0". Give the proxy name with java runtime
Click on Next,


Select the API from exchange and click on the Next
Step 4: Give the Upstream URL of your actual application that is deployed.
Make sure you give your path till /api as all RAML generated flows has a common base path as /api
Eg: http://myfirstapp.cloudhub.io/api
Once done, click on save

Step 5: Now on the screen, you can see the Deployment Configuration. Choose the runtime and name of the proxy app you want to give and click on deploy. The Application will be deployed in the Runtime Manager.
Step 6: Now edit the Consumer endpoint in API Manager with your proxy endpoint. So that all the requests will hit proxy application. Basically your implementation URL is your actual endpoint and Consumer endpoint is Proxy endpoint. So client hits proxy endpoint which in-turn is routed to implementation URL
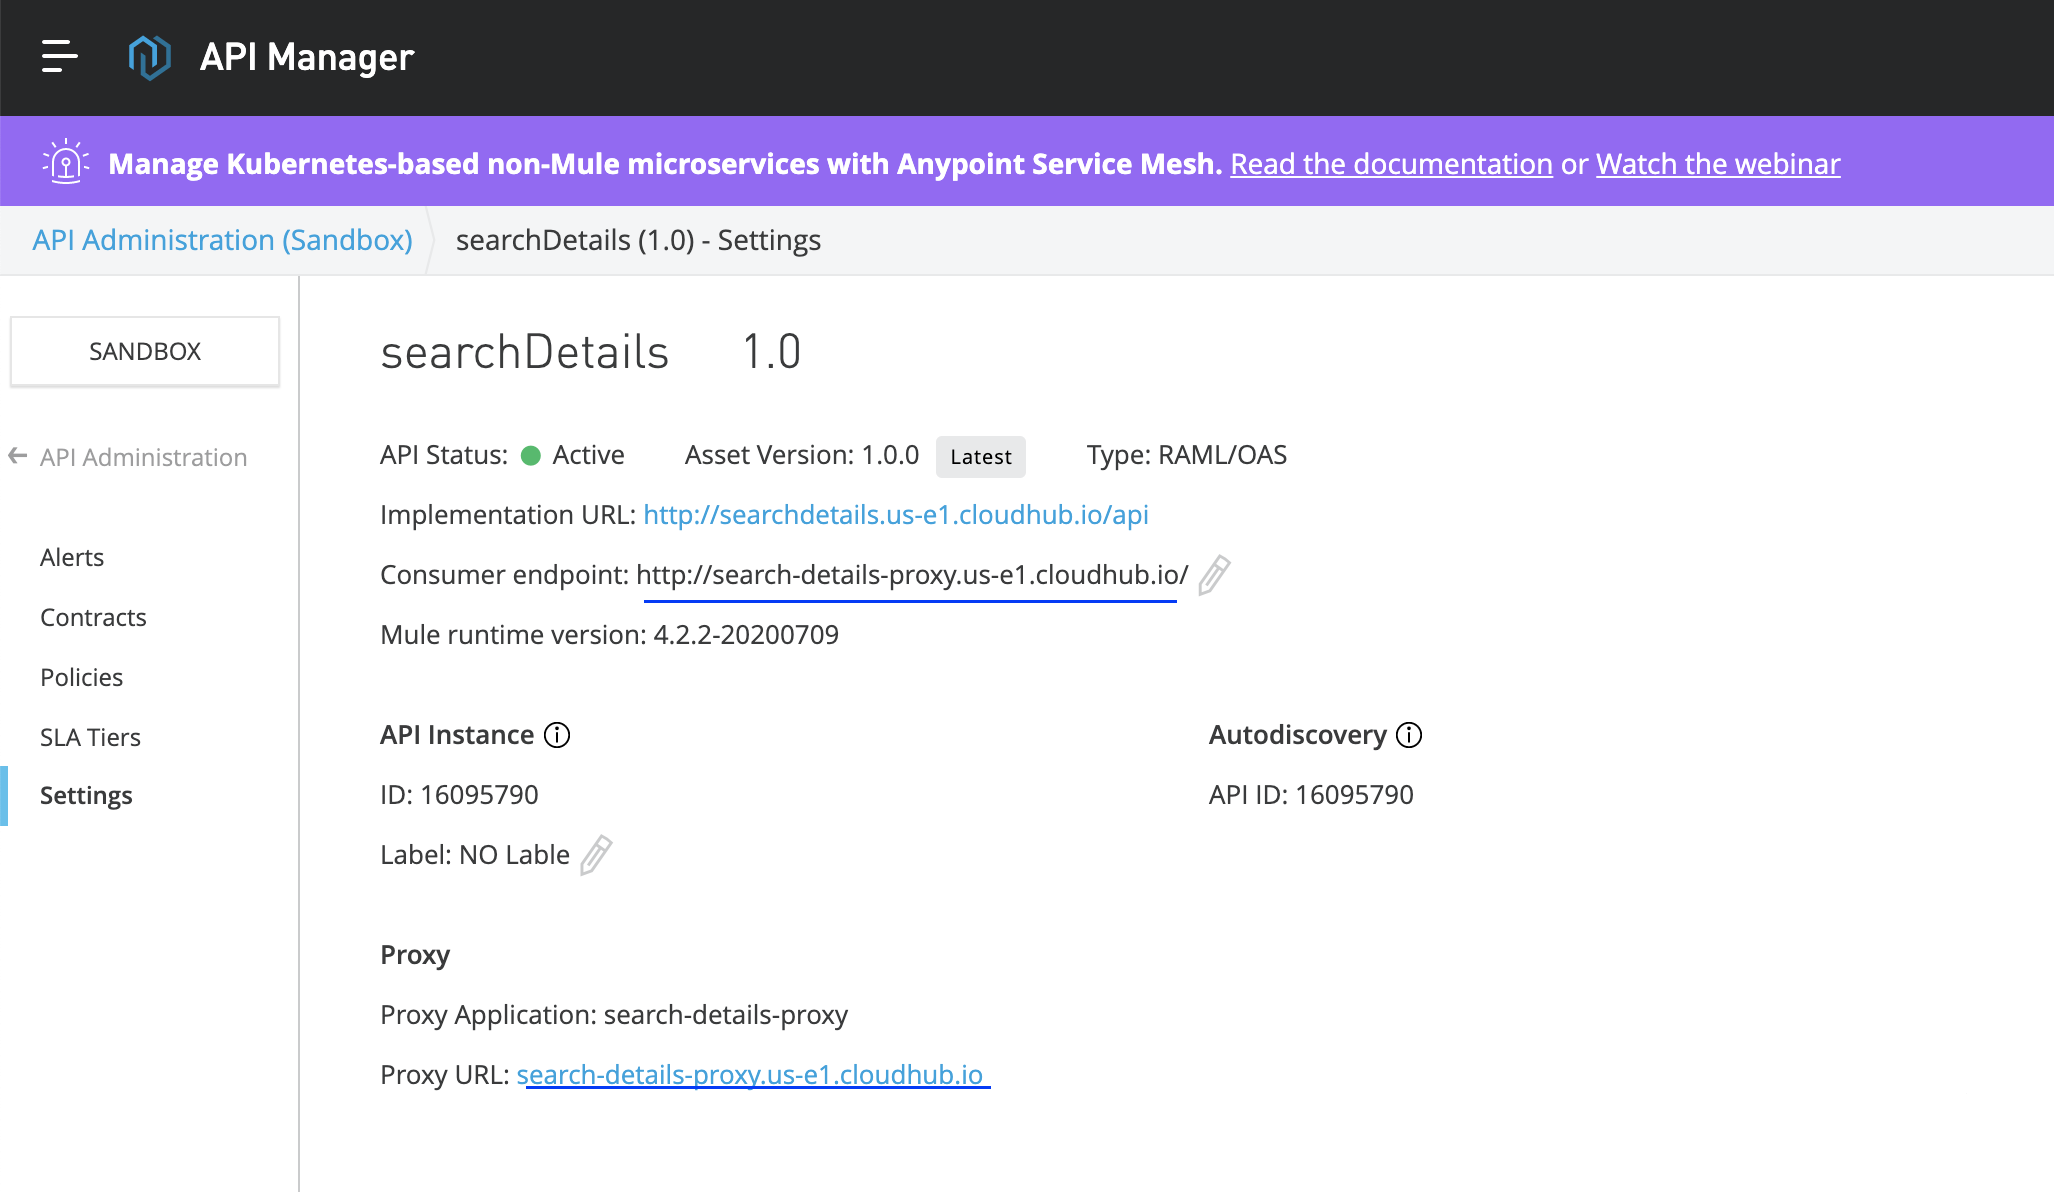
You can see client id and secret values are picked automatically and placed in Runtime properties. As well as you can download the jar of proxy app and import in anypoint studio where you can see api Id is automatically configured and the Http request will route to your main APP.
So you have to provide endpoint of Proxy app to consumers/clients so that they don’t have access to your main App. The policies are applied to your proxy app.
But the thing here is, we need additional vCore and worker to deploy our proxy app.
So according to your requirements, you can choose which method you want to follow to apply policies for your cloud hub Apps.
Pros and Cons :
Without Proxy Application :
You will save a vCore and worker.
As a developer, You need to know client id / Secret unless the deployment is managed by CI/CD process.
Manually you need to create a global element to invoke Auto discovery
You will expose your actual endpoint to client/Consumer.
Use case: If your APIs are used within the organisation , within Intranet, you can choose this option where we can share the endpoints directly. This saves vCores
With Proxy Application :
You will need additional vCore and worker for each proxy app you deploy.
As a developer, You need not know client id as it is managed internally.
No need for the manual process of using api id or using client id/secret
You will expose your proxy endpoint over actual endpoint to client/Consumer.
Use case: If your APIs are used outside of your organization, you can choose this option where we can share the endpoints of the proxy app instead of the actual endpoint. More secured
So these are 2 simple ways to apply policies!