Introduction:
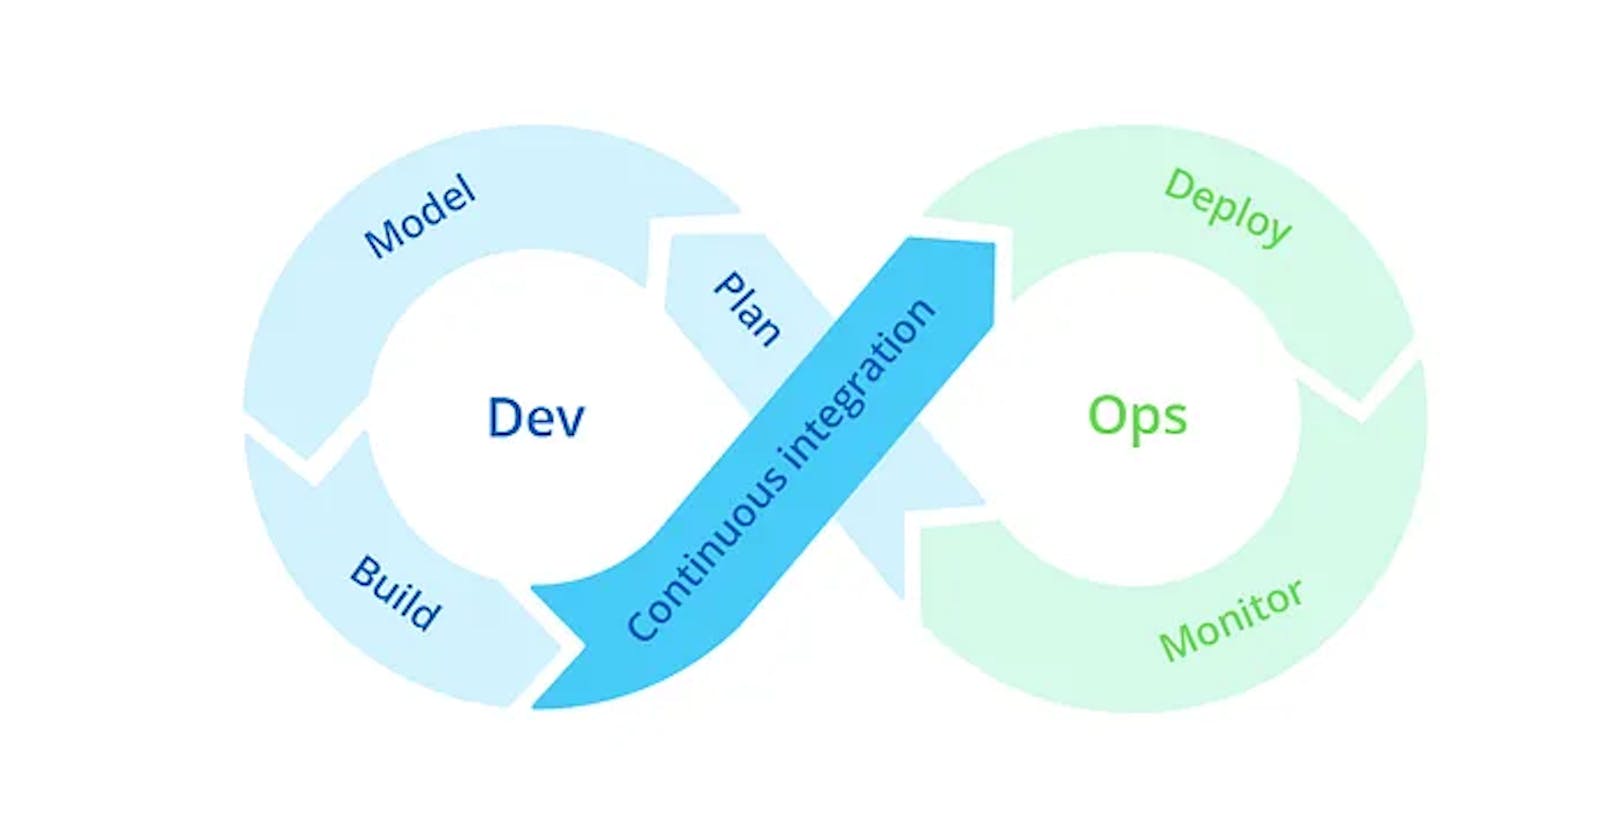
Continuous Integration (CI) is a development practice that requires developers to integrate code into a shared repository several times a day. A source code version control system is the core of the CI process.
Continuous Delivery (CD) is the ability to get changes of all types including new features, configuration changes, bug fixes and experiments into production.
Jenkins is a highly used automation tool to implement the CI/CD

Pre-requisties:
Maven
Java
Jenkins
GitHub configured with credentials
Anypoint platform configured with credentials
Jenkins Configuration and Installation
Step1: Download the Jenkins jar (https://www.jenkins.io/download/)
Step2: Unzip and execute the exe file and host the application.
Step3: Navigate to http://localhost:8080/ and login using the temporary password.
Step4: Create a administrator user and login with admin user and password
Step5: Configure github credentials and anypoint credentials in Jenkins
Jenkins>Credentials>System>Global credentials (unrestricted)>add credentials > save


Using Jenkins File:
- Step1: Create a New Item
Jenkins> new item> enter new item name(demo-pipeline) > select pipeline > save

- Step2: Jenkins>pipeline> build trigger tab> select Poll SCM\> set schedule value as > \ * * * * (Trigger build every one min. It can be customised based on the requirement)*

- Step3: Jenkins>demo-pipeline>pipeline tab> select pipeline script from SCM\> select SCM value as “Git”> provide git repository URL and select previously configured global git credential and branch “master” or customize the branch name where you want to implement CI/CD.


Step4: In Anypoint studio create a new mule project with Jenkins File.
Jenkins file is a file that contains the steps for pipeline stages. It is written in groovy syntax.
pipeline
{
agent any
stages{
stage('Build Application') {
steps {
bat 'mvn clean install'
}
}
stage('Deploy CloudHub') {
environment {
ANYPOINT_CREDENTIALS = credentials('anypoint.credentials')
}
steps {
bat 'mvn deploy -DmuleDeploy -Dusername=%ANYPOINT_CREDENTIALS_USR% -Dpassword=%ANYPOINT_CREDENTIALS_PSW%'
}
}
}
}

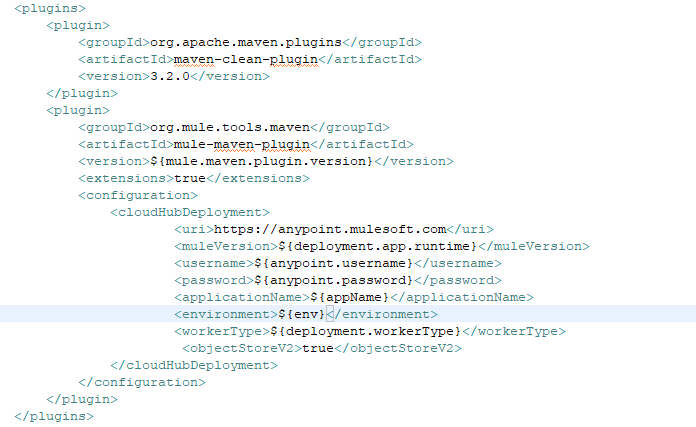
Step5: Configure the Mule maven plugin in pom.xml
<configuration>
<cloudHubDeployment>
<uri>https://anypoint.mulesoft.com</uri>
<muleVersion>${deployment.app.runtime}</muleVersion>
<username>${anypoint.username}</username>
<password>${anypoint.password}</password>
<applicationName>${appName}</applicationName>
<environment>${env}</environment>
<workerType>${deployment.workerType}</workerType>
<objectStoreV2>true</objectStoreV2>
</cloudHubDeployment>
</configuration>

Note:
In the context of a Jenkinsfile or a batch script executed in a Windows environment, you would use %ANYPOINT_CREDENTIALS_USR% to access the value of the environment variable. Conversely, in a Unix-like environment or when using scripting languages like Bash or Groovy, you would use ${ANYPOINT_CREDENTIALS_USR}
We will use jenkins credentials() function to lookup our credentials using ID value. This function then automatically sets two environment variables named {ourvariable}_USR and {ourvariable}_PSW.
Step6: Trigger the build and check for build status

Using Batch command Mule Maven Plugin
Step1: Configure the Mule maven plugin in pom.xml
<configuration>
<cloudHubDeployment>
<uri>https://anypoint.mulesoft.com</uri>
<muleVersion>${deployment.app.runtime}</muleVersion>
<username>${anypoint.username}</username>
<password>${anypoint.password}</password>
<applicationName>${appName}</applicationName>
<environment>${env}</environment>
<workerType>${deployment.workerType}</workerType>
<objectStoreV2>true</objectStoreV2>
</cloudHubDeployment>
</configuration>

Step2: Create a new Item in Jenkins using free-style project

Step3: Configure the Github credentials with repo url

Step4: Poll SCM every minute

Step5: Add the build step using batch execute command
mvn clean deploy -DmuleDeploy -DskipTests -Danypoint.username=yourusername -Danypoint.password=yourpassword -Denv=Sandbox -Ddeployment.region=us-east-2 -Ddeployment.workers=1 -Ddeployment.workerType=MICRO -DappName=mulesoft-cicd-sample1 -Dapp.runtime=4.6.2

Step6: Check for the build status and anypoint platform for deployment status.


